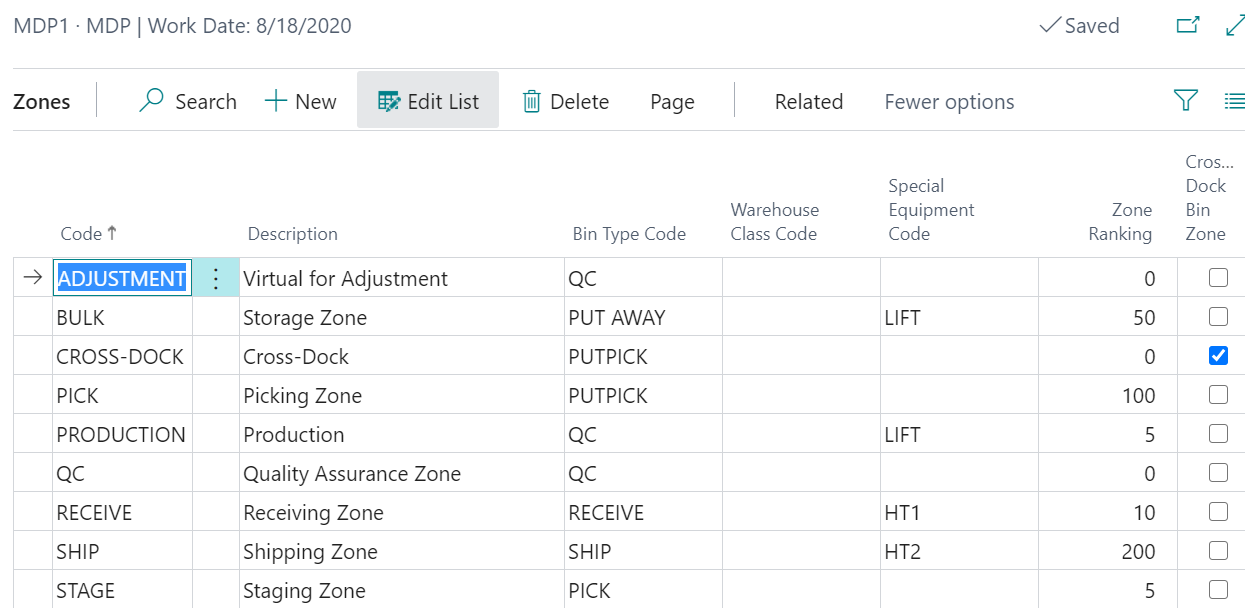
Overview
I mentioned In my previous article that there are multiple ways of setting up warehouse management.
In reality, however, there really are two ways: there’s the option of setting up your warehouse with Directed Pick and Put-away…and the wrong way.
In almost all companies where bin location management (or warehouse management using wireless scanners) is desired, setting up your warehouse with Directed Pick and Put-away will be the correct decision.
The Setup
Assuming you’ve done the necessary prep work in your warehouse for a warehouse management system, you will then need to configure the existing Locations in Business Central to be warehouse enabled.
Basically, to enable a location for Direct Pick and Put-aways, you will need to run a process called Create Warehouse Location from the Location List.
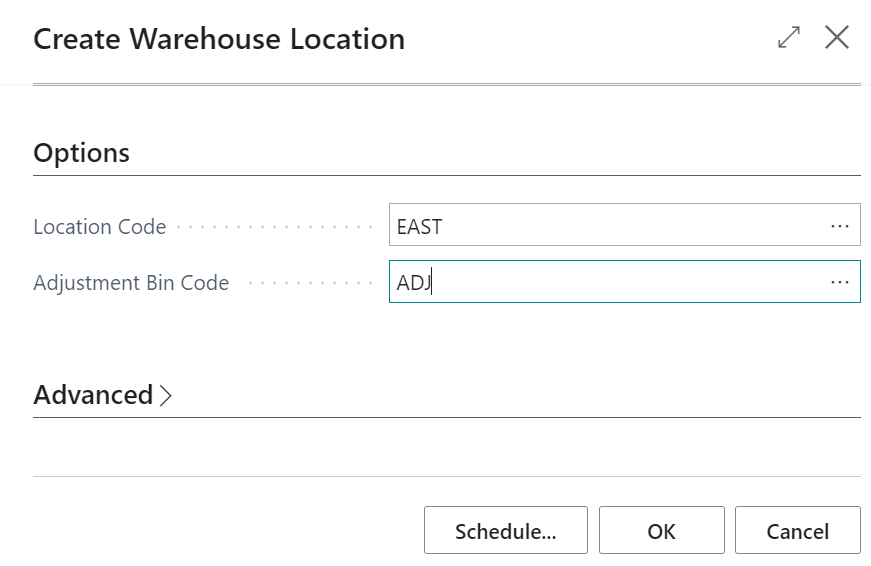
Then, you will need to enter the Location you wish to enable the Directed Pick and Put-away for, in addition, the Adjustment Bin.
When you click on the Create Warehouse Location process, it will do the following:
- Enable Directed Pick and Put-away on the Location Card
- Move all inventory in the Location to the Adjustment Bin setup in the Location Card
The purpose of the Create Warehouse Location process is that it will move your inventory quantities to the Adjustment Bin.
Moving the items to the Adjustment Bin allows you to do a physical count using the Warehouse Physical Inventory Journal or the Warehouse Item Journal to move the items from the adjustment bins into the regular physical bins in the warehouse.
Any remainder inventory quantities not accounted for using the warehouse journals will be counted as Positive or Negative Adjustments when you run the Calculate Warehouse Adjustment process from the Item Journal.
The Problem
For the location (or warehouse) to be able to properly process orders with Directed Pick and Put-away enabled, you need to associate each Bin with a Bin Type Code and a Zone Code.
However, when you’re setting up the Zones and the Bins for the Location for the first time, you will NOT be able to define a Zone Code or a Bin Type Code against the Bin.
If you try to define a Zone and a Bin Type for the Adjustment Bin, you will counter an error saying the Zone Code must be blank.
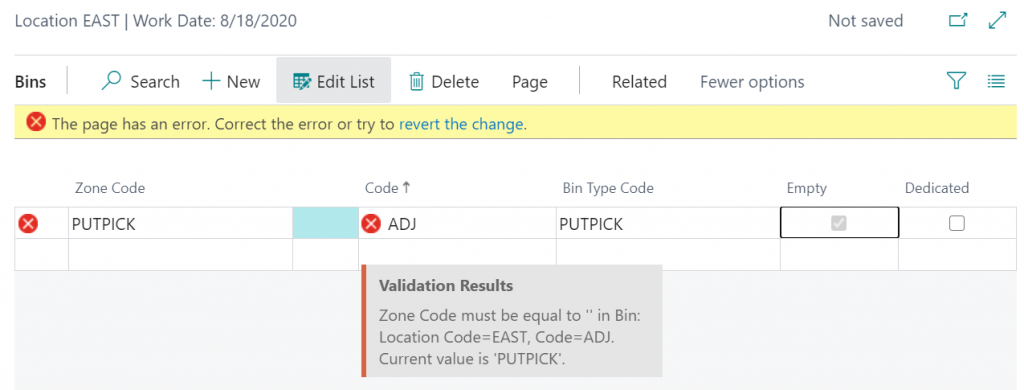
The reason you’re getting this error is because you need the Directed Pick and Put-away marked as true on the Location Card in order to fill in the Zone Code and the Bin Type Code.
But you can’t mark the Directed Pick and Put-away as true if there are inventory quantities in the location. Which is enabled by running th Create Warehouse Location process.
And you shouldn’t run the Create Warehouse Location unless the Adjustment Bin is setup with the proper Zone Code and the Bin Type Code.
We have quite the problem here…
What if I Run the Process Without Zone and Bin Type?
Yes, you can run the process without defining the Zone and the Bin Type on the Bins, but that’s not what you should do. In fact, that’s where most people get in serious trouble.
After the Create Warehouse Location process is finished, you’ll want to go in and fill in some additional bins or begin setting up other bins in the warehouse.
However, if you go into the Bin screen to setup additional bins, you’ll encounter this error:
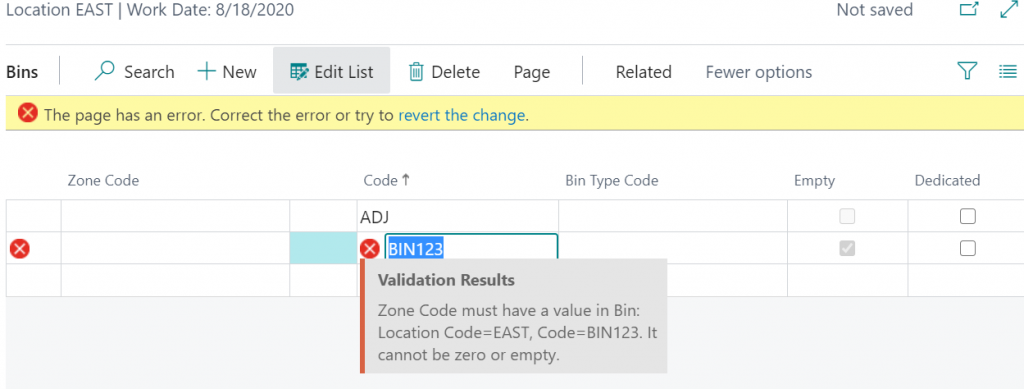
That’s correct. In order to add additional bins in a location with Direct Pick and Put-away enabled, BC requires you to have a Zone Code and Bin Type Code.
Now you’re screwed.
If you continue using WMS in the current setup, you’ll have some bins with Zones and some bins without Zones.
When you do adjustments, it will not properly move items from the bins with Zones and bins without Zones, leaving you with tons and tons of inventory quantity problems that are too many to list in this article. That’s pretty much a nightmare.
You’re now in a world of hurt.
The Correct Way to Enable Warehouse Location
Before you run the Create Warehouse Location process, make sure you set up all of the Zones and the Bin Type codes with the zones.
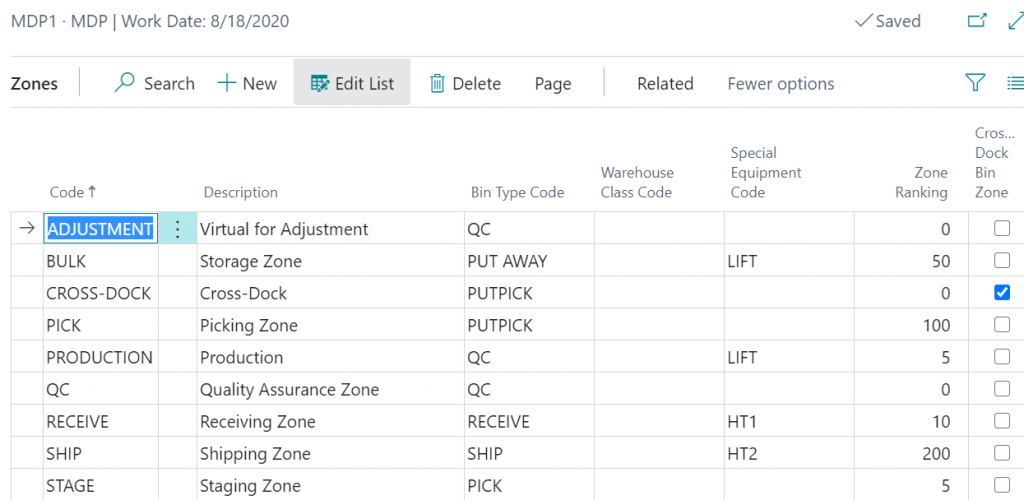
How how do we do this if the system is blocking us from doing the right thing?
The answer is by forcing it using Rapidstart.
When you create the Bins, you need to utilize RapidStart Configuration Package to FORCIBLY fill in the Adjustment Bin Code WITH Zone Code and Bin Type Code.
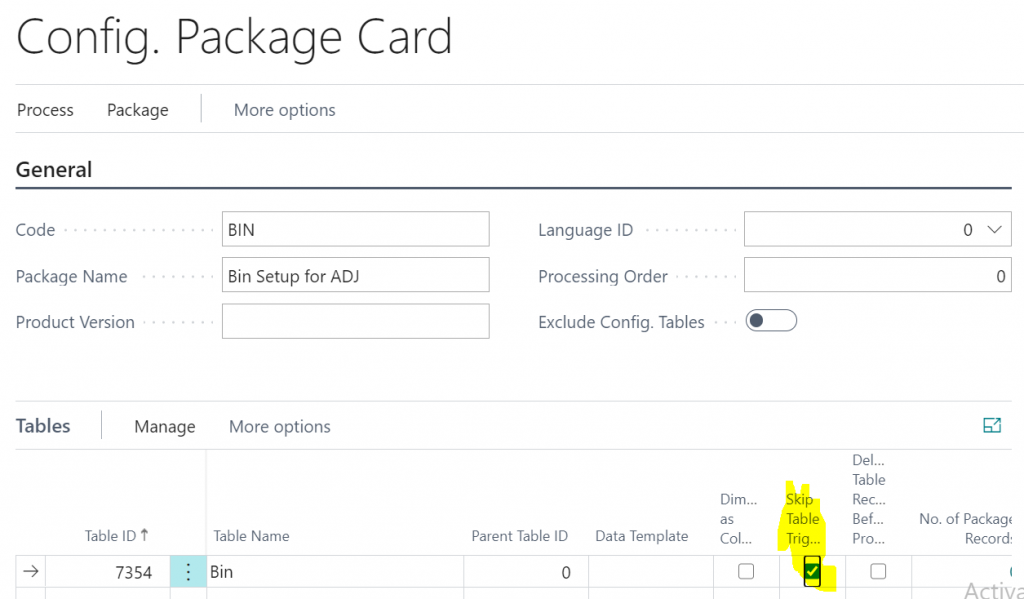
The 4 fields you need on the Bin table are:
- Location Code
- Bin Code
- Zone Code
- Bin Type Code
This way, the bins will be inserted with the proper Zone Code and Bin Type Code when the adjustment entries are created.
Processing future transactions within the warehouse will flow normally and all in the world will be well again.
Conclusion
This is the conundrum when enabling a Location to be Directed Pick and Put-away. During the setup of the warehouse, you’re not able to use Zones. After the location has been converted to have full WMS, you’re required to use Zones.
While I’m not sure if Microsoft will address this issue in the future, at least, now you’ll know how to fix it.
That being said, having your warehouse move off of a manual-based process to an automated (or computerized) one, in itself, is often not an easy task as it requires buy-in from the warehouse users and reconfiguring the warehouse process so it all flows so flows in a smooth and consistent way…but this will be a topic for a separate article.
