Overview
Dynamics 365 Business Central (formerly known as Dynamics NAV) is a comprehensive ERP system. As such, it has many features that caters the different needs of businesses, for example, manufacturing, service managment, CRM, distribution, etc. Each one of these functional areas can be configured a number of ways depending on the needs of the business. During my time working at AP Commerce, there are never any shortages of investigating different setups based on on the needs of a business.
What you think you need may not be what you need. Yes, I did write that in one stroke without flinching. One of the most common requests from potential and current users of Business Central (Dynamics NAV) is they want to effectively manage their warehouse using warehouse management system.
The question I’m always tempted to ask is: “What type of Warehouse Management are you looking for?” Of course I never ask that question because this will cause more confusion than I can handle.
So why am I tempted to ask that question? Again, in each functional area in Business Central (Dynamics NAV), there are a number of ways to set it up. Having said that, here are different ways to setup WHM for your business. Note that Warehouse Management can be defined per warehouse, so every warehouse that you have can be setup differently.
NOTICE! The purpose of this article is not to give you a complete step by step instruction on BC (NAV) warehouse management, the purpose is to give you some knowledge on different ways to go about implementing WHM so you can have some knowledge and input when you speak with your Dynamics NAV partner on it.
Considerations
One word of caution is when implement ANY warehouse management system, you have to make sure your warehouse is organized, efficient, and accurate. A lot of companies make the mistake of buying a warehouse management software because the warehouse is too messy.
DON’T DO IT!
Software, in general, is designed to streamline your operation and speeed up the processing. If your warehouse is disorganized, inefficient, and not accurate, any warehouse management software will make it worst. You will be disorganized, inefficient, and inaccurate at a faster rate. Garbage in, garbage out.
The Flavors
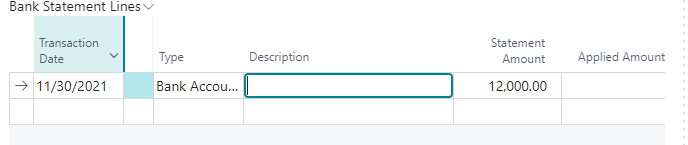
Here’s a picture of the Warehouse Mangement setup in Dynamics 365 Business Central (Dynamics NAV):

Bin Mandatory
From initial look, if you just want to keep track of the items on the bins, this is the option for you, right? Unfortunately, no… I’ve never been in an implementation where we just place a checkbox on this field without at least enabling Ship/Pick or Receive/Put-away.
Just checking this on enables you to keep track of items by bin, however, one of the main problem with just checking this on is that you specify bin on the purchase and sales order. So if you have an item that’s on 2 different bins, you have to split the sales/purchase lines. Not only that, if you want to move an item from one bin to another, you have to use the item reclass journal, which effectively creates Item Ledger, value entry, and the general ledger. Doing physical inventory may also create a lot of excessive entries that will bog you down when you use the Item Ledger to do any sales and purchase analysis.
Pros: Allows you to tag bin code to an inventory transaction
Cons: Have to split sales and purchase line so the quantity matches the bins on the item ledger Creates a lot of excessive entries to key ledger tables Makes life harder than it has to
You Typically See This Setup for: No one. You’re better off using the Shelf/Bin No. field on the item card. This is how NAV 2.0 handles bins. We’re in Business Central now, no sense in going backwards when there are better options.
Require Shipment/Receive
Just enabling these option allows you to use the Warehouse Ship/Receive function. The main purpose of the Warehouse Ship/Receive is to allow the user to batch the sales orders by a container or a trailer going out per carrier. This option is typically enabled for companies that ships and receives by containers. The warehouse shipment is typically used to generate your bill of lading for the trucker.
Without turning on Pick and Put-away, I would NOT recommend turning on Bin Mandatory. You would encounter the same problem that I’ve stated above. For smaller companies, spliting up the warehouse process may not be necessary.
Pros: Allows you to Ship and Receive by container or bill of lading Warehouse Manager can control what he/she wants to ship based on released orders instead of the order processor printing out a pick ticket The warehouse process is separated out from the order fulfillment process (so warehouse can do their own posting) More accurate inventory can be achieved since inventory can be relieved when it’s shipped
Cons: Not recommend to enable Bin Mandatory (same cons as above) Not necessary if you do not wish the warehouse people to be posting stuff
You Typically See This Setup For: Large item distributors or manufacturers that want split out their warehouse processing, but does not care of bin contents Companies that ship and receive by containers but do not want to split their items into bins in the warehouse.
Require Pick/Put-away (No Require Shipment/Receive)
This is an option is what I would like to call the mini-fullblown warehouse management. This options provides the flexibility for the warehouse staff to create warehouse put-away and warehouse picks as they see fit, they can also assign these warehouse documents to the appropriate people to do the processing. Another way to use this feature is to allow the order fulfillment people to create the pick request to the warehouse without actually printing a pick ticket.
The draw back of using this option is that you’re only allowed to have one sales/purchase order per put-away/pick. This means that you won’t be able to group the orders together in one warehouse shipment (as stated above) to generate a consolidated bill of lading. Same goes for the receiving side, you won’t be able to receive by container or by bill of lading.
This option works perfectly if you want to enable Bin Mandatory. The Inventory Pick/Put-away document generated will allow you to split lines at the warehouse document level so you can put the items away in their proper bin without having to modify the original purchase or sales order.
Pros: Allows you to easily process inventory transactions by Bin Warehouse Manager can control what he/she wants to ship based on released orders instead of the order processor printing out a pick ticket The warehouse process is separated out from the order fulfillment process (so warehouse can do their own posting) More accurate inventory can be achieved since inventory can be relieved when it’s shipped
Cons: Not able to group orders together into one shipment or receipt Not be able to use ADCS (wireless handheld)
You Typically See This Setup For: Companies that would like to organize their warehouse by bin, but does not have the manpower to go Directed Pick/Put-away.
Directed Pick and Put-away
This is the full deal. It has all of the benefits that I’ve listed above. Group order together by warehouse shipment and be able to pick and put away by bins. Not only that, this allows you to use ADCS (wireless handheld device) so your warehouse staff and record warheouse transactions using the handheld.
All good right?
Not exactly. It really depends on what your company needs. All these features sounds cool, but if your business does not need it, trying to shove it in may create more work and processes than necessary. There are a couple of steps where the user need to interface with a computer when you enable Directed Pick and Put-away:
1. Create the sales order
2. Create warehouse shipment
3. Create pick
4. Register pick
5. Post warehouse shipment
6. Post sales order
Whereas if you do not enable any of these, the steps would be:
1. Create the sales order
2. Post the sales order
Conclusion
It’s highly recommended that you get with your Dynamics 365 Business Central (Dynamics NAV) partner and discuss which setup is right for your business RIGHT NOW with consideration for future growth. If you try to implement everything without any consideration for your current operation, the operational efficiency will decrease. This is because of the increased overhead and maintenance that are required.
Make sure your company have the manpower and the infrastructure to absorb the overhead and maintenance required so the increase in efficiency and accuracy can be realized.
Do not implement some feature just because you like the feature. In most cases, it will be overkill. It’s like buying a size 10 top-of-the line Nike tennis shoes for your 3 year old son and forcing him to walk in it every day. Eventually, he will grow into it. But by the time he grows into it, he’ll develop some other major problems that will cost more money to fix.